Start with your hens, not with the wood
Before we talk about screws, frames, and nesting boxes, I always start with a simple question: what do your hens really need? Every flock is a little family. Some birds are bold and curious, some are shy and like quiet corners. When I built my second coop, I made the mistake of planning around a fancy drawing instead of the actual birds. The shy hens were always hiding in the darkest corner, and the bossy hen blocked the doorway.
When you learn how to build a wooden chicken coop, keep in mind three gentle promises to your hens: “I will keep you dry, I will keep you safe, and I will give you fresh air.” If your coop does those three things, the rest can be simple and a bit rustic.
Safe size and space for everyday comfort
For most backyard flocks, I like to follow an easy guideline: at least 4 square feet (about 0.37 m²) of indoor coop space per hen, and about 8–10 square feet per hen in the outside run. If your hens spend long winter days inside, aim for even more room. I once tried to squeeze seven hens into a small old shed. Nobody got hurt, but I saw more pecking and grumbling because they could not get away from each other.
| Number of hens | Minimum indoor space | Comfortable outdoor run |
|---|---|---|
| 3–4 hens | 12–16 sq ft | 32–40 sq ft |
| 5–6 hens | 20–24 sq ft | 50–60 sq ft |
| 7–8 hens | 28–32 sq ft | 70–80 sq ft |
| 10 hens | 40 sq ft | 100 sq ft or more |
Choosing the right spot for your wooden coop
The place where you set your coop is as important as how you build it. My favorite coop sits on a gentle slope, under a small tree. In summer the leaves give shade, in winter the low sun still reaches the coop. When I forgot about shade with another coop, my hens panted on hot days, and I had to add a roof extension later.
What I always look for
- Dry ground: Avoid spots where rainwater collects. Damp soil means muddy feet and more smell.
- A bit of shade: A tree, a hedge, or the shadow of a building helps in summer.
- Easy access for you: You will go there every day. Make sure you can walk there easily in the dark and in the rain.
- Not too close to bedrooms: Roosters and early hens can be noisy at sunrise.
- Protection from wind: A hedge or fence can break the strongest winds.
Materials and tools: keep it simple
When people ask me how to build a wooden chicken coop, they often think they need special tools. The truth is kinder: you can do a lot with simple, common tools and basic timber. Your hens will never check if you used a fancy brand of screws.
Basic materials I trust
- Framing wood: 2x4 or similar boards for the frame and legs.
- Wall panels: Exterior grade plywood or tongue-and-groove boards.
- Roofing: Plywood plus shingles, metal sheets, or bitumen panels.
- Wire mesh: 1/2 inch hardware cloth for windows and run, never simple chicken wire for predators.
- Screws: Exterior or deck screws, they hold better than nails.
- Hinges and latches: Strong and simple, ideally with carabiners or secure closures.
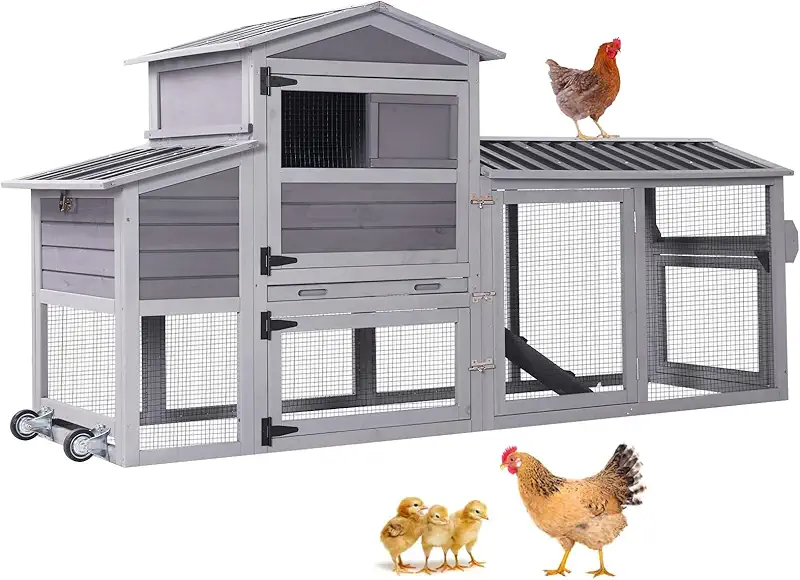
If you do not have many tools, or your hands tire easily (mine do more each year), a pre-built wooden chicken coop kit can be a gentle friend. It gives you clear pieces, pre-cut panels, and a structure designed for beginners. You can still add your personal touches, like extra ventilation or stronger latches.
When I helped my neighbor with her first hens, we started with a wooden coop kit. It arrived in panels, and together we finished it in one afternoon. The hens moved in the same day, and she felt proud instead of exhausted. If you feel more like my neighbor than like a carpenter, looking at some ready wooden coops can give you calm and inspiration.
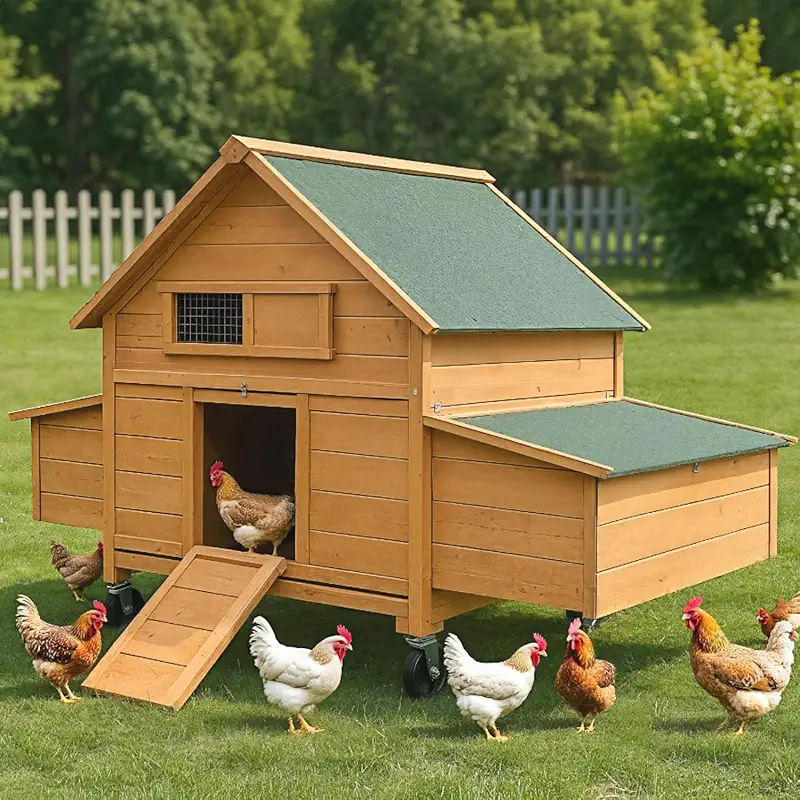
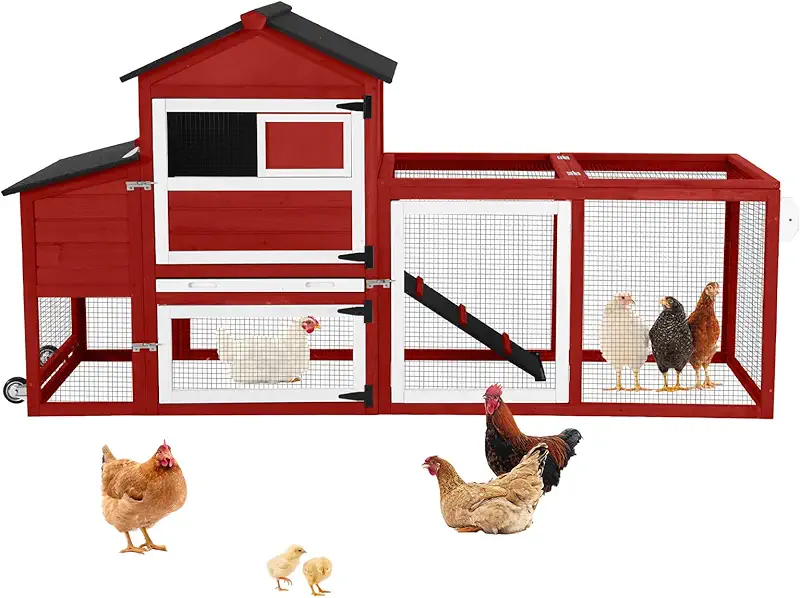
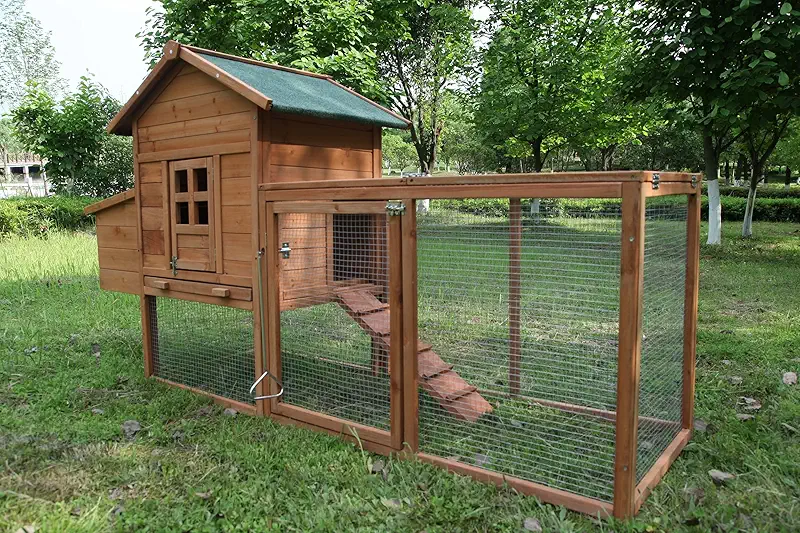
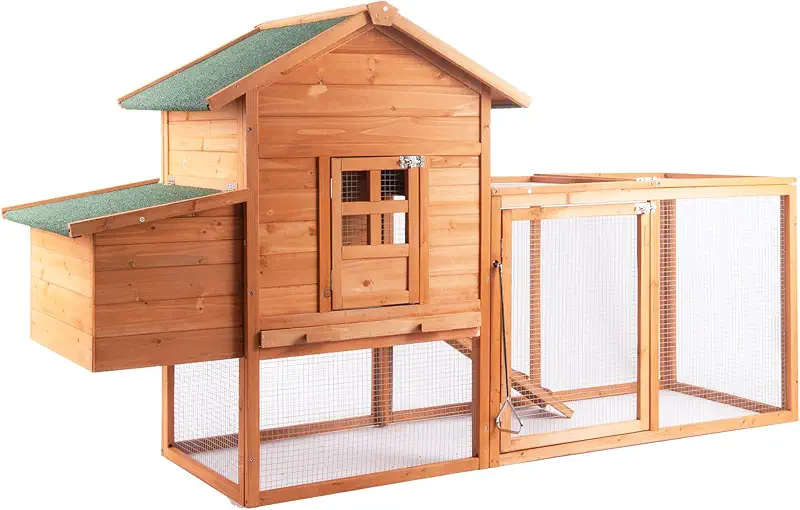
Many solid wooden coops are available in different sizes, from tiny backyard flocks to wider family flocks.
Let me browse calmlyStep-by-step: how to build a wooden chicken coop frame
A strong frame is the skeleton of your coop. Once you set a good frame, the rest feels almost like putting clothes on a body. These are the simple steps I follow nearly every time.
- Mark the footprint: Use a tape measure and stakes or chalk to mark the outside edges of the coop on the ground.
- Raise the coop off the ground: I like the floor at least 12–18 inches above soil. This keeps the wood drier and gives your hens a cool shade under the coop in summer.
- Build the base frame: Make a rectangle from your 2x4s. Check the corners by measuring diagonals; if both diagonals match, your frame is square.
- Add floor joists: Add cross pieces inside the rectangle to support the floor. Space them about every 16 inches.
- Install the posts or legs: Screw sturdy legs to each corner. Make sure they are all the same height so your coop sits level.
- Attach the floor: Fix plywood or solid boards on top of the frame with screws.
During this stage, take a moment to stand inside the frame and move as if you were cleaning. Stretch your arms, bend down, imagine scraping the floor. If you already feel cramped, it is still easy to add a little extra length or width.
Walls, doors, and windows: thinking like a hen
When I plan walls and openings, I try to imagine myself as a hen on a cold rainy day. I want a quiet, dry corner, a safe roost above the floor, and enough fresh air without a draft blowing directly onto my feathers.
Coop walls
Fix vertical studs at each corner and between, then attach your wall panels. I leave a small gap between the top of the wall and the roof line on at least two sides, covered with hardware cloth from the inside. This becomes soft ventilation, high above roost level.
Human access door
Please do not skip a proper human-sized door. I made that mistake once, with only a small hatch and a lift-up roof. Cleaning was a daily struggle, and my back still remembers it. A door that lets you step inside or at least reach all corners with a rake makes life easier for years.
Chicken pop door
The pop door is the little entrance your hens use. I like it about 10–12 inches wide and tall. Place it a little above floor level so bedding does not spill out. A simple ramp with small cleats every few inches gives them a gentle climb.
Windows and ventilation
For good air, I always add at least one window and two high ventilation openings. Every opening is covered with hardware cloth, firmly stapled and then secured with screws and washers if possible. This keeps raccoons, rats, and other night visitors out.
Cross-ventilation, with openings on opposite sides, helps moist air and ammonia leave the coop. The air should never feel heavy when you open the door in the morning.
Inside the coop: roosts and nest boxes
The inside of a wooden chicken coop is like a simple bedroom and living room for your hens. They need a place to sleep, a place to lay eggs, and a clear floor area to walk.
Roost bars
Chickens sleep on roosts, instinctively choosing the highest safe place. I use smooth wood bars, about 2x2 or slightly larger with rounded edges. Flat side up is kinder for their feet. Place the roosts a little higher than the nest boxes but not too close to the ceiling; they need headroom to hop up.
- Allow about 8–10 inches of roost space per hen.
- Keep bars at least 12 inches away from walls to avoid messy walls.
- If you have several bars, stagger them so hens above do not sit right over those below.
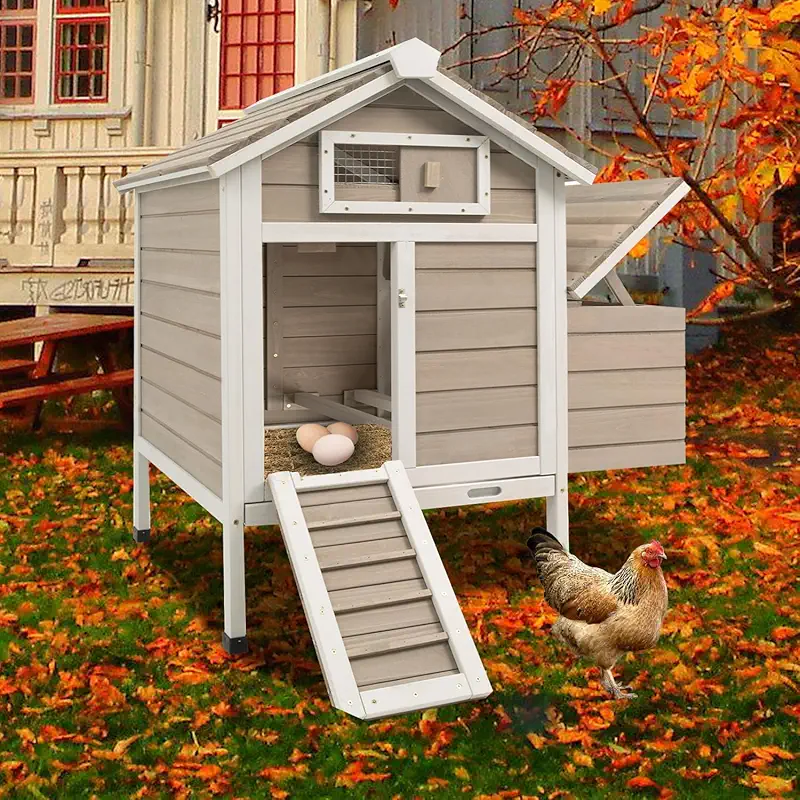
Nest boxes
Nest boxes are the quiet, cozy corners where eggs appear like small miracles. I still smile every morning when I lift the lid and feel the warmth of a fresh egg. One nest box for every 3–4 hens is usually enough; they like to share.
I place nest boxes lower than roosts so hens are not tempted to sleep there. Soft bedding like straw, wood shavings, or hay helps keep eggs clean and safe from cracks.
The roof: keeping everything dry
A leaky roof can undo all your good work. Wet bedding, damp wood, and cold drafts are not kind to chickens. That is why I give the roof special care when I build a wooden chicken coop.
- Slope: Even a simple single-slope roof works well if the highest side faces the prevailing wind.
- Overhang: I like at least 6–8 inches of overhang to protect walls and openings.
- Solid base: Plywood or boards beneath the roofing for strength.
- Roofing material: Shingles, metal, or bitumen all work if installed tightly.
In very hot areas, a light-colored roof reflects heat and keeps the coop cooler. In snowy regions, a steeper slope helps snow slide off instead of sitting heavy on top.
Predator protection: thinking like a fox at night
It is not always a nice thought, but when learning how to build a wooden chicken coop, you must think like the creatures who might visit at night. I have lost birds in the past, and it still hurts to remember. Those losses taught me to build with predators in mind from the very first screw.
- Buried mesh apron: Around the run, I lay hardware cloth on the ground, at least 12 inches out from the fence, then cover it with soil or stones. This stops digging.
- Solid latches: Raccoons have clever hands. I use latches that need two movements or add a carabiner.
- No big gaps: Any opening larger than 1/2 inch should be closed or covered with mesh.
- Secure windows and vents: Every opening, even high ones, is covered in strong mesh, never thin chicken wire alone.
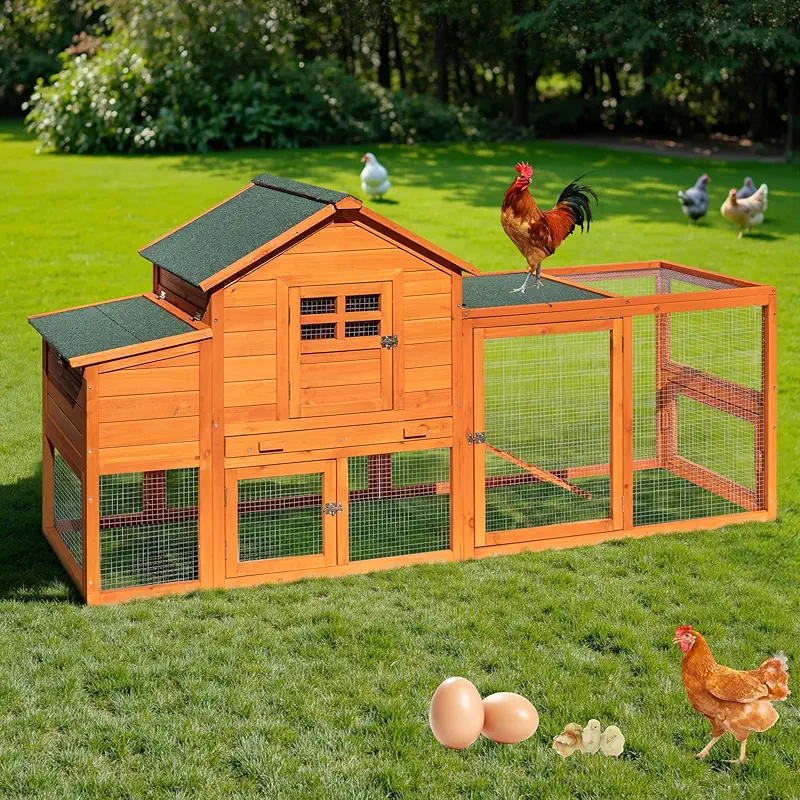
Run and outdoor space
Your coop is the bedroom, but your hens will spend much of their day outside if they can. A wooden coop connected to a safe run lets them scratch, dust-bathe, and enjoy the weather while staying protected.
I like to give them a mix of open ground for scratching and a couple of covered corners to stay dry when it rains. A simple tarp over part of the run can help. Add a low platform or old stump for them to hop onto; they love a little variety.
Maintenance and care: making your wooden coop last
A wooden chicken coop can last many years if you treat it kindly. Once a year, usually in early spring, I do a “big clean” and check every corner. The hens watch me from the garden, complaining softly because I move their things around, but they enjoy the fresh bedding afterward.
- Scrape and remove all old bedding.
- Check for soft or rotting wood, especially around the floor and windows.
- Tighten any loose screws and latches.
- Look for tiny holes or cracks where pests could enter.
- Refresh any safe, animal-friendly wood protection if needed.
Weekly spot cleans, where you remove the dirtiest bedding and check the nest boxes, keep smells down and hens cheerful. Remember, if you would not like to sit on that roost, your hens probably would not either.
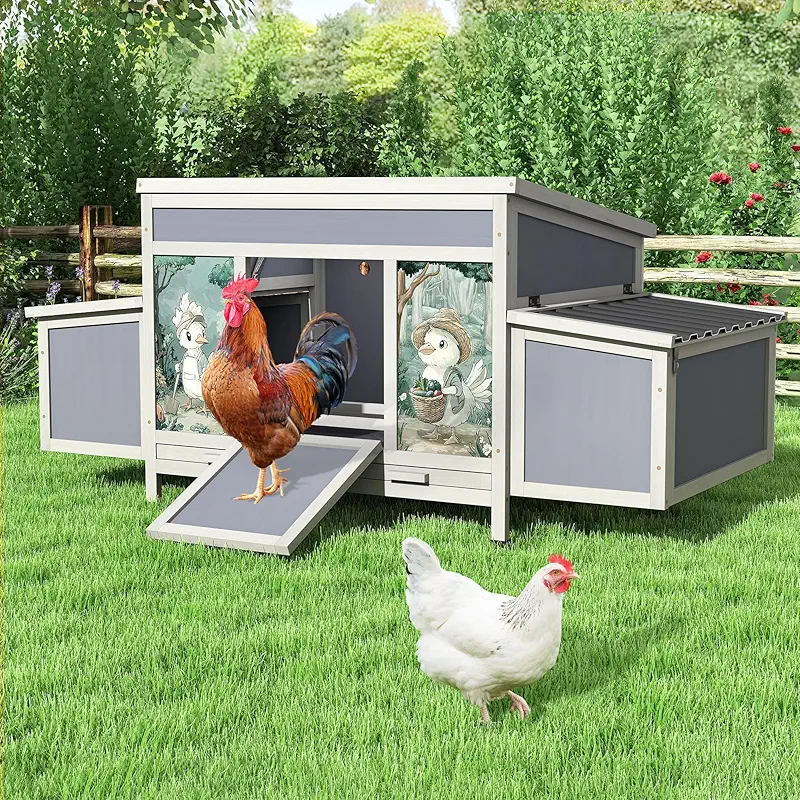
When a wooden coop kit makes sense
There is no shame at all in starting with a pre-built wooden coop. I often suggest it to beginners who feel nervous around saws or who simply do not have much time. You can still learn how to build a wooden chicken coop in a gentle way: by assembling a kit, seeing how the parts fit together, and later adding your own modifications.
Some people start with a smaller wooden coop and later connect it to a second one, or extend the run. Wood is forgiving. You can almost always screw on an extra panel, add a window, or build a new pop door.
If you feel more excited about holding eggs than holding power tools, looking through different wooden coop designs can give you ideas and a soft starting point. You might find something that suits your flock size, your yard, and your energy right now.
From simple little huts to larger walk-in coops, there are many wooden homes your hens could feel safe in.
I want to see optionsMy final thought: build with calm and kindness
When I think about how to build a wooden chicken coop, I do not see boards and screws first. I see hens dust-bathing in the sun, wiping their beaks on the wooden ramp, and lining up in the evening to go inside, one after another, with that soft murmur they make.
Your coop does not have to impress anyone on the internet. It only needs to make your flock feel safe and make your daily care gentle on your body and your time. Measure twice, breathe slowly, and do not be afraid to ask for help or use a kit if that feels kinder to you.
In the end, a coop is not just a structure; it is a promise you make to your birds: “Here, you are safe. Here, you are home.”